A guide on how to create a modal dialog that can be used as a confirmation step, used for adding additional details or even display more details in a current screen.
Background
Two SharePoint lists exist in this guide. One list called ‘Specialist Bookings’ the other called ‘Specialist Details’.
List 1: Specialist Bookings
| Column Name | Details |
| Title | Single Line of Text Required Created by default |
| Description | Multiple Lines of Text |
| Specialist Name | Single Line of Text |
List 2: Specialist Details
| Column Name | Details |
| Title | Single Line of Text Required Created by default Default Value set to ‘NA’ |
| Specialist Details | Single Line of Text This will be used as a lookup in the ‘Specialist Bookings’ |
| Specialist Location | Single Line of Text |
| Specialist Phone Number | Number |
Delete Confirmation Screen
Have you ever had a user say that it is to easy to delete an item in PowerApps? Do users want a confirmation on whether they should delete something or not? Well using control order, contextual variables and grouping when can create the PowerApps version of a Pop-Up confirmation screen.
Steps to create
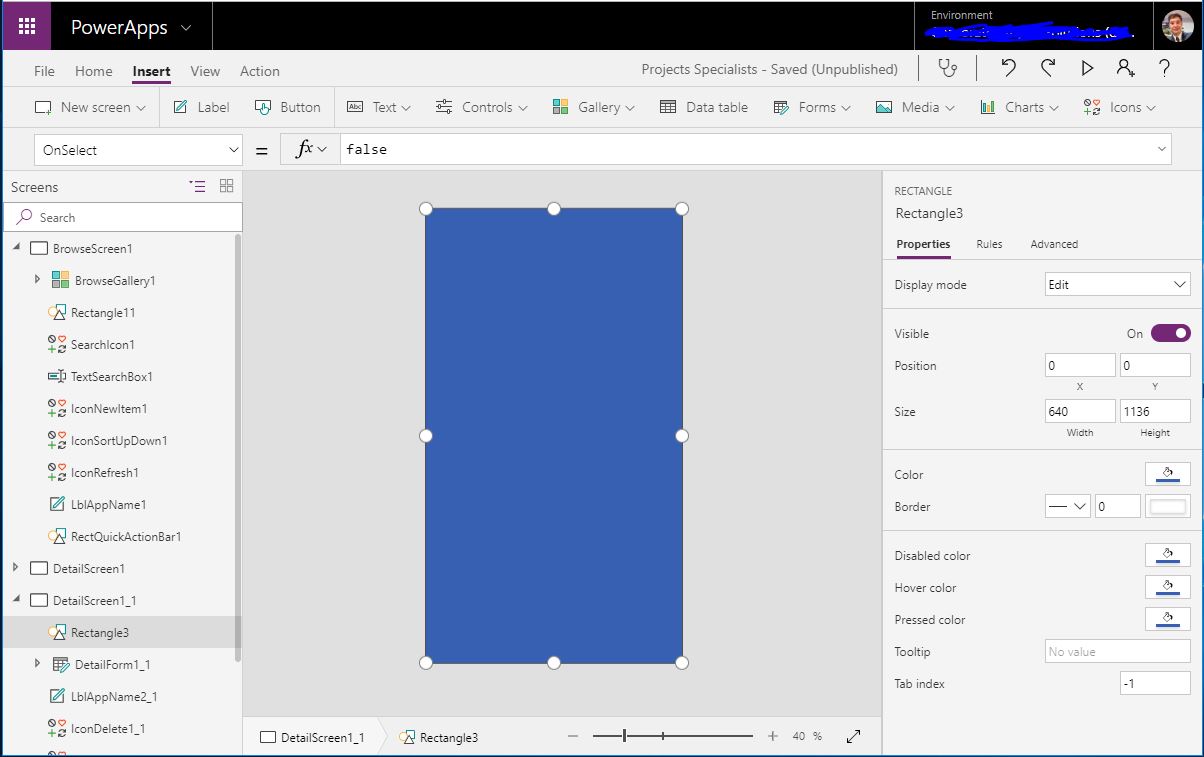
Step 1: Create Rectangle that covers edit screen
Create a rectangle by selecting Insert > Icons > Rectangle
Set the rectangles Fill Property to be more transparent. This can be done by changing the last value in the RGBA to a decimal point.
RGBA(56, 96, 178, .5)
Step 2: Create Label for Confirmation Text
Create a label by selecting Insert > Label
Set the background colour of the label to something that contrasts the colour of the rectangle. For the above colour code I set the fill property to white. This can be done in the right hand properties pane. The label is then moved to just above vertical and horizontal centre.After the placement add some text to ask the user if they are sure about the deletion. Step 3: Insert the Confirmation Buttons
Buttons need to be added to allow the user to select if they actually want to delete the item or not. To insert the button select Insert > Button.Copy and paste the first button and change the text to be answers to the confirmation text done in step 2. In the example the buttons have had their width reduced and the text is set to ‘yes’ for one and ‘no’ for another.
Tip: You don’t have to use buttons for the confirmation, you could use icons or images as all of these controls have a ‘OnSelect’ property.
Step 4: Grouping of controls
To ensure that the ‘Dialog’ shows and hides when we expect it is easier to create a group that contains each of the individual controls. To do this select the rectangle, label and both buttons from the screens section on the left hand side. Hold the ctrl key down when selecting the controls to select multiple at once.Once selected right click and select group.
Tip: PowerApps uses ordering. if the grouped boxed isn’t at the front then you need to bring it forward. This can be done from the home tab > Reorder > Bring to front
Step 5: Update the delete icon to show the dialog box
The delete icon ‘OnSelect’ property needs to be updated to update a context variable. A context variable is one that is can only be used in the current screen. Make sure you copy the original value of the delete icon ‘OnSelect’ property and place it in a notepad file as this will be used for the confirmation button.The OnSelect property for the group has been changed to:UpdateContext({ctxvar_delcon:true})A context variable is created that will contain a Boolean – either true or false. This context variable will then be used as the visible property value on the group we created in step 4.
Tip: If you can’t select the icon in the UI panel because of the rectangle use the screens control navigation (furthest left tool bar) and locate the icon that way. By Default it will be called IconDelete1
Context variables further reading
Step 6: Update the confirmation buttons
Part A: Yes Button
The Yes button OnSelect value should be replaced by the formula copied from the delete icon in step 5. At the end of the formula the context variable created needs to be updated to hide the group created in step 4.The formula should look something similar to:
Remove(SpecialistBookings, BrowseGallery1.Selected); If (IsEmpty(Errors(SpecialistBookings, BrowseGallery1.Selected)), Back());UpdateContext({ctxvar_delcon:false})Part B: No Button
The no button or cancel button just needs the context updating to hide the group created in step 4. The formula to update the context would look something like:
UpdateContext({ctxvar_delcon:false})Additional Details Pop Up
The dialog box could also be used to introduce more additional details possible enhancements to the above could be expanding the details of a contact that is displayed in a booking form.
Summary
This method of being able to add dialog boxes to a single screen enables more information to be embedded into a single screen. This function can easily provide ways of giving users a confirmation on actions, show additional details dynamically and even provide ways of adding details to other data sources. An example of that could be an app that looks at dynamics and you can add multiple entities in a single screen.

Thanks for your blog post! it helped me a lot to add a message box to my Power App.
LikeLike